DSCA emblem

SCMS ICAM Registration

Interactive registration guide for DoD E-ICAM SCMS access requests

Before you start

Use this page to complete your SCMS ICAM registration through DoD E-ICAM. Follow the steps in order. The E-ICAM registration site is slow. Allow extra time after typing or clicking before results display or selections appear.

Open NIPR ICAM Open Public ICAM
Important: During registration, users may encounter errors, severe system messages, long delays after clicking buttons, or situations where it appears the request has reverted back to the beginning. In many cases, the request is still processing in the background. Be patient, allow extra time for the page to respond, and verify the status of your request before starting over.
Possible Errors and How to React

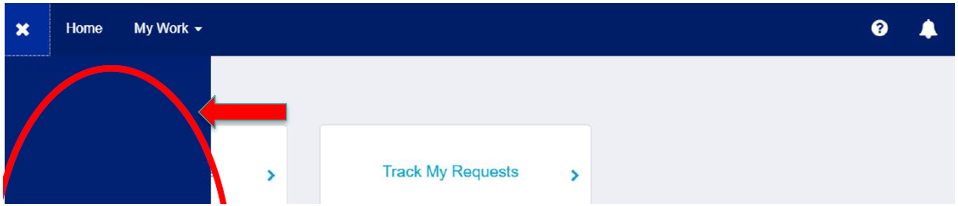
Blank Menu / Missing Options

If the left-side menu is blank or expected options do not appear, close all open browsers and reopen DoD E-ICAM. If needed, clear your browser cache and try again.

Slow Response / Delayed Actions

The E-ICAM site is slow. After selecting roles, filters, or buttons, wait several seconds before clicking again. A selection may still be processing even if nothing appears to happen immediately.

Request Appears to Revert / Start Over

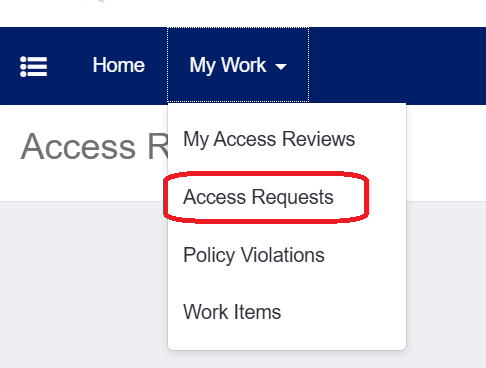
In some cases, after clicking a button, the system may appear to return to an earlier screen or look like the request was not accepted. Do not immediately restart. Wait, reload only if prompted, and verify the request status under My Work > Access Requests.

Reload / Cancel Message After Signature

If you receive a reload or cancel message after clicking I Acknowledge, click reload and then check My Work > Access Requests on the home page to confirm the request submitted successfully.

Attachment Problems

If the paperclip icon shows a red asterisk, documentation is required. Upload the Cyber Security certificate as a PDF only. If the file does not appear immediately, wait several seconds before attempting another upload.

Errors Continue

If errors persist after clearing cache, reopening browsers, and retrying, wait a few minutes and try again. If the issue remains unresolved, submit a ticket to DISA.
Step 1 — Open DoD E-ICAM and Manage User Access
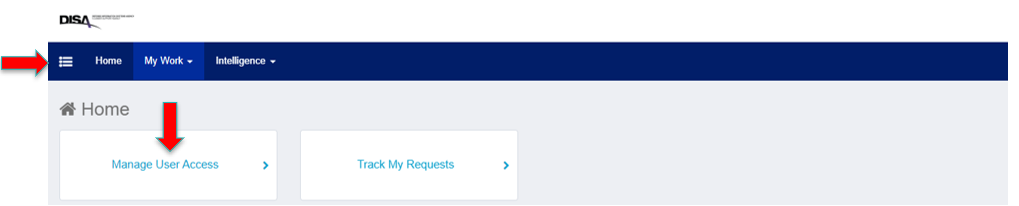
  1. Go to DoD E-ICAM using the NIPR ICAM link.
  2. Click Manage User Access on the home page.
  3. Alternatively, use the hamburger menu, open Manage Access, then select Manage User Access.
Manage User Access screen

Manage User Access

Step 2 — Filter for SCMS Roles
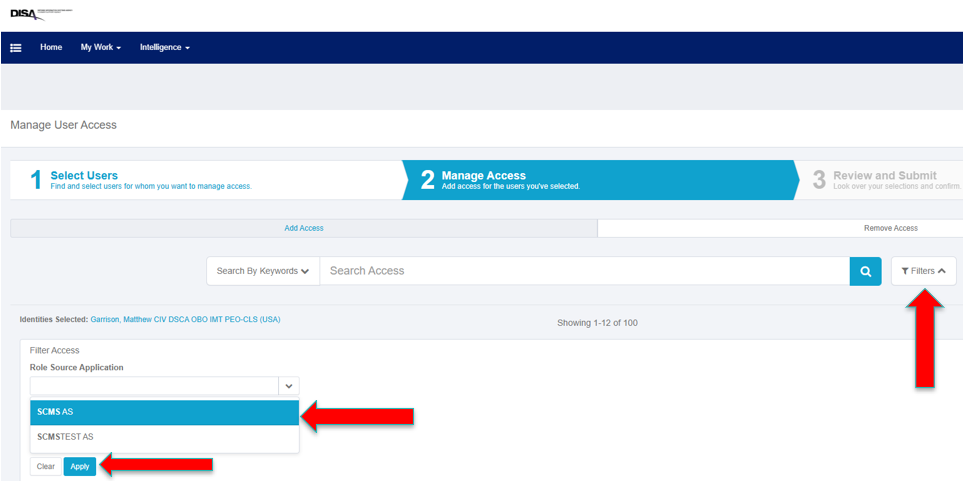
  1. Click the Filters button.
  2. Type SCMS in the Role Source Application filter.
  3. Wait several seconds for results to display.
  4. Select SCMS AS and click Apply.
Filter for roles screen

Filter for SCMS roles

Step 3 — Select Your SCMS Role(s)
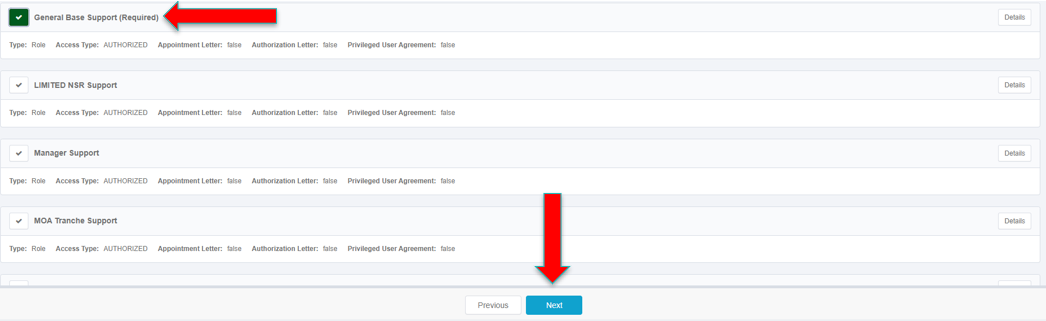
  1. Click the checkmarks for the role(s) you need.
  2. For basic access to SCMS, select General Base Support (Required).
  3. Wait several seconds after selecting a role. The checkmark will eventually display as green.
  4. When finished selecting your roles, click Next.
Select roles screen

Select SCMS roles

Step 4 — Upload Required Attachments
  1. To the right of selected roles, use the paperclip icon to upload attachments.
  2. If the paperclip icon shows a red asterisk, documentation is required.
  3. If required, upload your Cyber Security certificate in PDF only format.
  4. You can drag and drop or click the upload hyperlink.
  5. After uploading, you can enter a file description.
  6. When all required attachments are uploaded, click Submit to continue.

Attachment Note

DoD E-ICAM does not validate PDF content. Supervisors are responsible for verifying uploaded files.

Comments

You may use the speech icon to enter comments related to your role request.
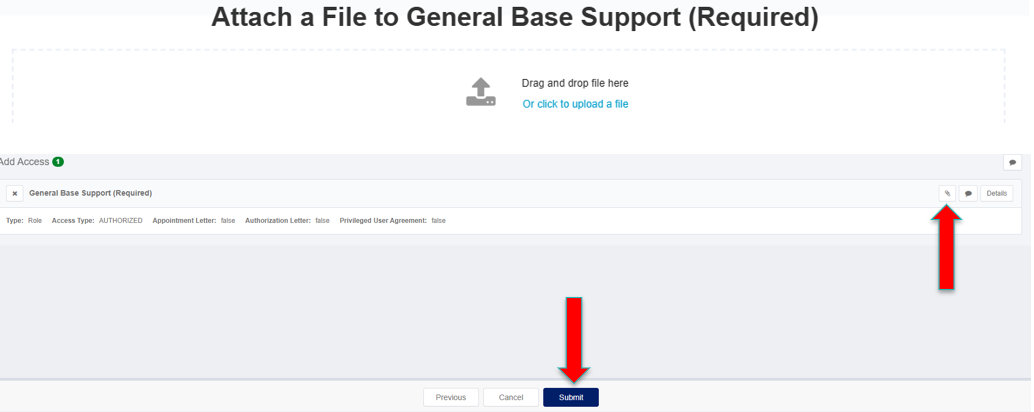
Upload attachments screen

Upload required attachments

Step 5 — Complete Form
  1. Click Complete Form to continue.
Complete request form screen

Complete form

Step 6 — Validate System Authorization and Access Request
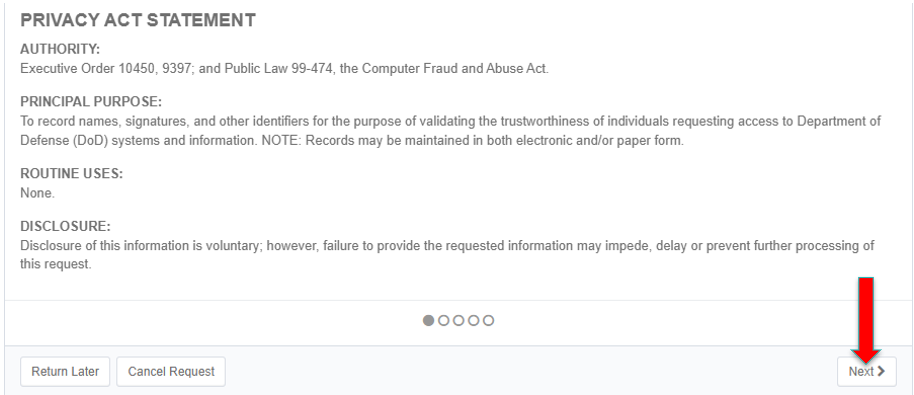
  1. Review the Privacy Act Statement and click Next.
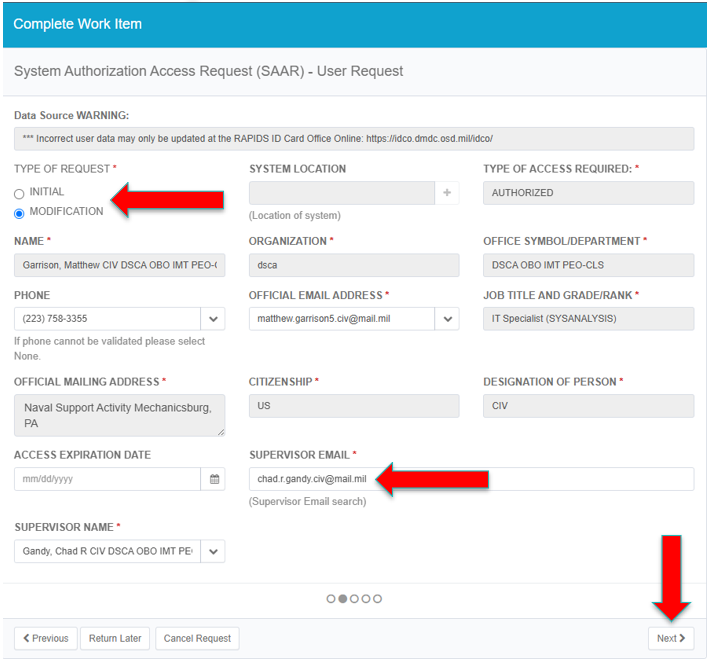
  2. Review and populate any required fields marked with a red asterisk.
  3. Most fields should already be pre-populated.
  4. Select Initial if this is your first E-ICAM SAAR for SCMS.
  5. Select Modification if you have already submitted an E-ICAM SAAR for SCMS.
  6. If Supervisor information is not auto-populated, enter the Supervisor email address. If found in the database, the Supervisor Name field should auto-populate.
  7. Click Next.
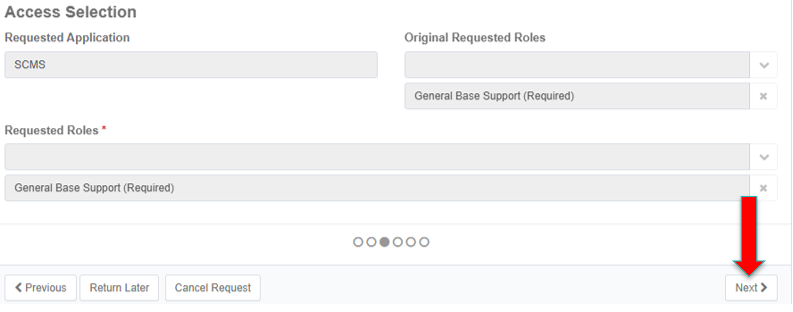
  8. Review the Access Selection and click Next.
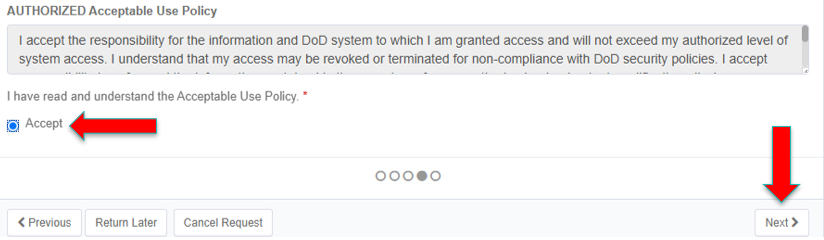
  9. Read the Acceptable Use Policy.
  10. Click Accept to confirm, then click Next.
Step 7 — Complete Access Details
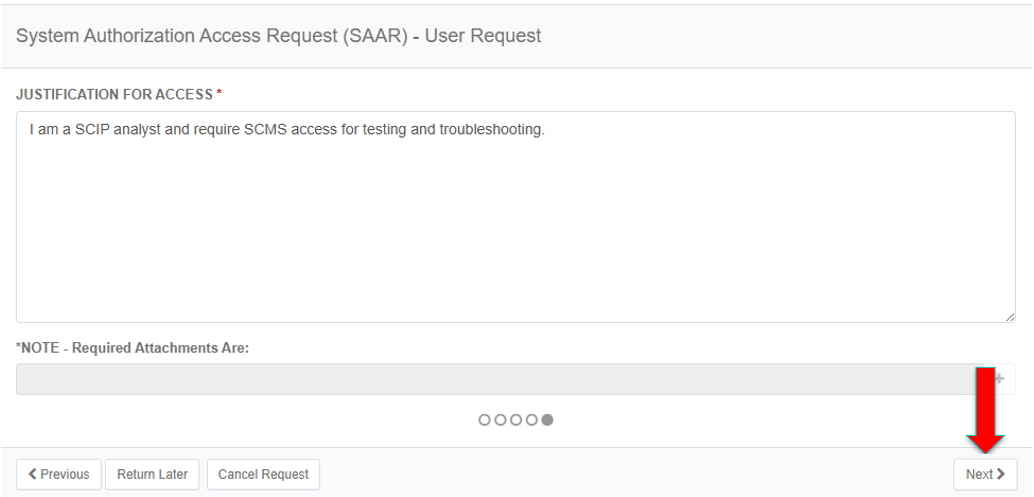
  1. Enter a required justification statement in the Justification For Access text box.
  2. The wording may vary by organization.
  3. Click Next.
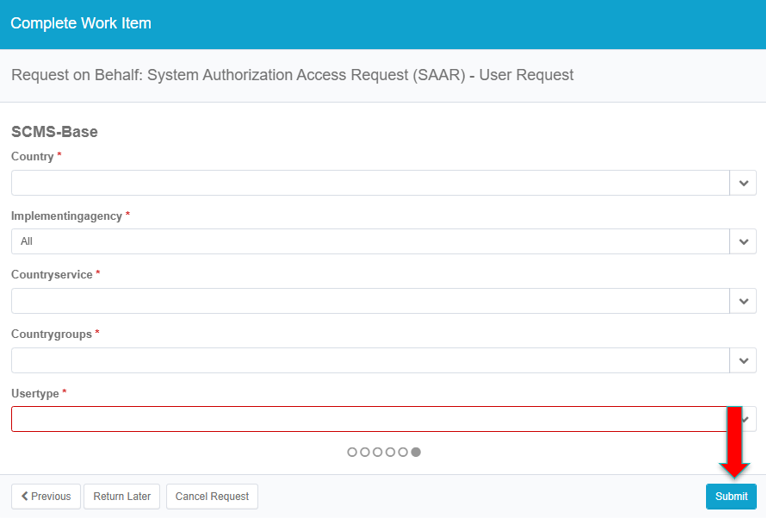
  4. Select values for each required dropdown.
  5. You may select All values for Country, Implementing Agency, and Country Service, where appropriate.
  6. If selecting multiple Country Groups, select each group individually.
  7. Foreign national note: you may only select one country.
  8. Click Submit to move to the final step.
Step 8 — Digitally Sign and Submit
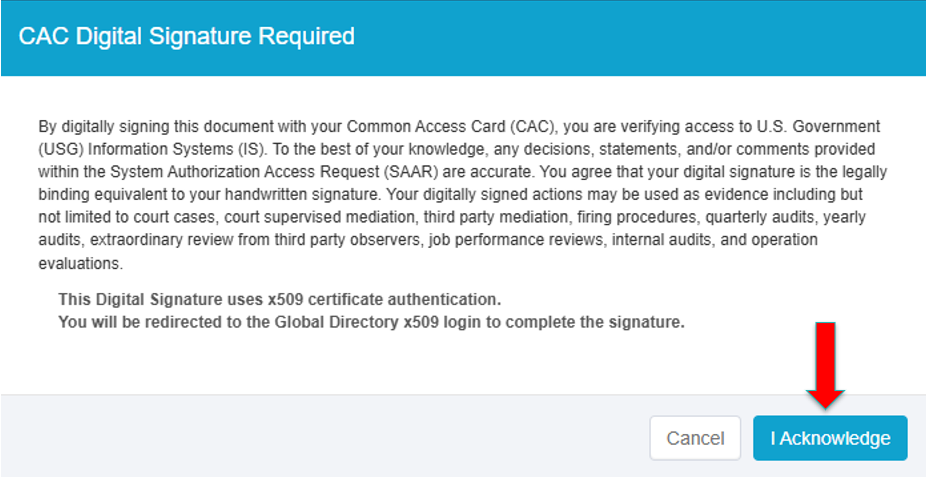
  1. Review the CAC Digital Signature Required statement.
  2. Click I Acknowledge to complete the submission process and move your request into approvals.
  3. After clicking I Acknowledge, it may take several seconds to return to the E-ICAM home screen.
Digital signature and submit screen

Digitally sign and submit

Step 9 — Confirm Request Submission
  1. After submitting your request, return to the E-ICAM home screen.
  2. Navigate to My Work > Access Requests.
  3. Verify that your SCMS request appears in the queue or list of submitted access requests.
  4. If the request is visible there, your submission was successful and is now in the approvals process.
Access Requests screen

Confirm request in Access Requests